
Create and save a watercolor bear character in C2Story
Follow the actual form inputs and screenshots used to create Milo, a watercolor bear. Generate, confirm the character is saved, and find the entry point for a new story.
What you will finish
Create one reusable character, confirm that it remains in your library after a page reload, and locate the action that brings it into the story composer. This is a small character-creation tutorial. The finished result is the saved character below; creating an entire book or video is outside this walkthrough.
This run was performed in the live C2Story website on September 14, 2026. Every screenshot comes from that browser session. You need to sign in and have enough credits for the button’s displayed charge.
Step 1 — Open Create Character
Go to Create Character. You can also open Characters and choose Create Character. Keep the default Generate with AI mode and the Character asset type. The page also offers Upload Image and Photo to Character; we did not use either in this run.
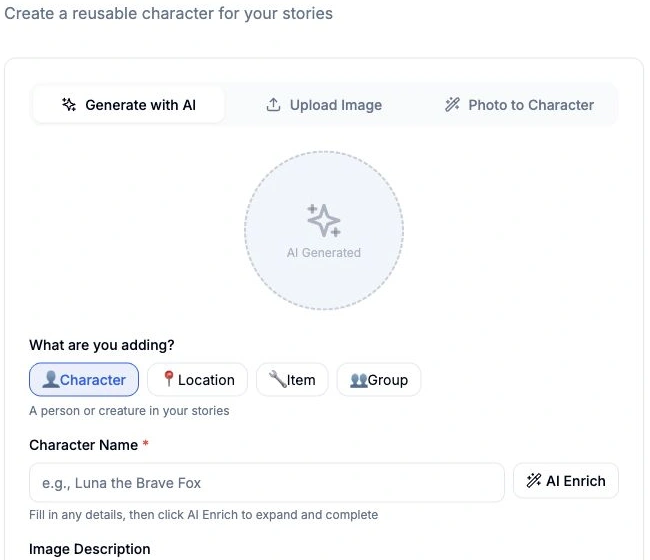
The actual Create Character form: Generate with AI and the Character asset type.
Step 2 — Enter the actual character brief
Enter Milo the Little Gardener in Character Name. Paste the following exact text into Image Description:
Milo is a small friendly brown bear with round ears, warm dark eyes and a cream muzzle. He wears sage-green overalls over a pale yellow shirt and carries one small blue watering can. Full body, relaxed standing pose, gentle smile, soft watercolor on textured ivory paper, simple uncluttered background. One character, no text.
We chose Watercolor in Art Style, entered bear in Species/Type, and used this Clothing value:
Sage-green overalls and a pale yellow shirt.
Appearance, Personality and Background were left empty. We did not use AI Enrich. This form did not expose a model selector, aspect ratio or seed, so none was selected or claimed. The Image Description is our actual input; we cannot see any additional internal generation prompt in this form.
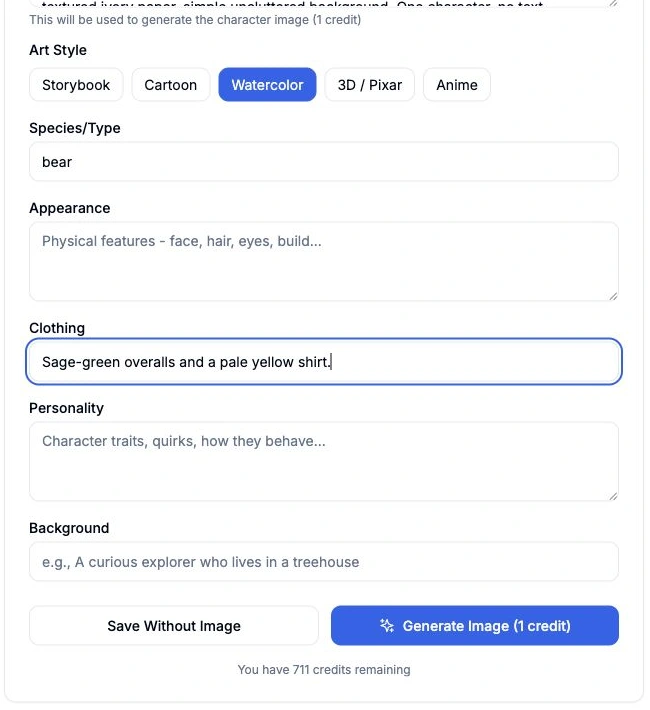
Actual Watercolor selection, species, clothing and the Generate Image button before submission.
Step 3 — Generate once and inspect the result
Click Generate Image (1 credit) once. During our request, the fields and actions were disabled while the image was being generated. Wait for the result instead of submitting again.
The completed page showed the generated character plus Regenerate (1 credit), Generate as New (1 credit), View in Library and Start Over. The displayed balance went from 711 to 710, a decrease of one credit. No retry or second generation was needed.

After the request completed, View in Library appeared alongside the regeneration actions.
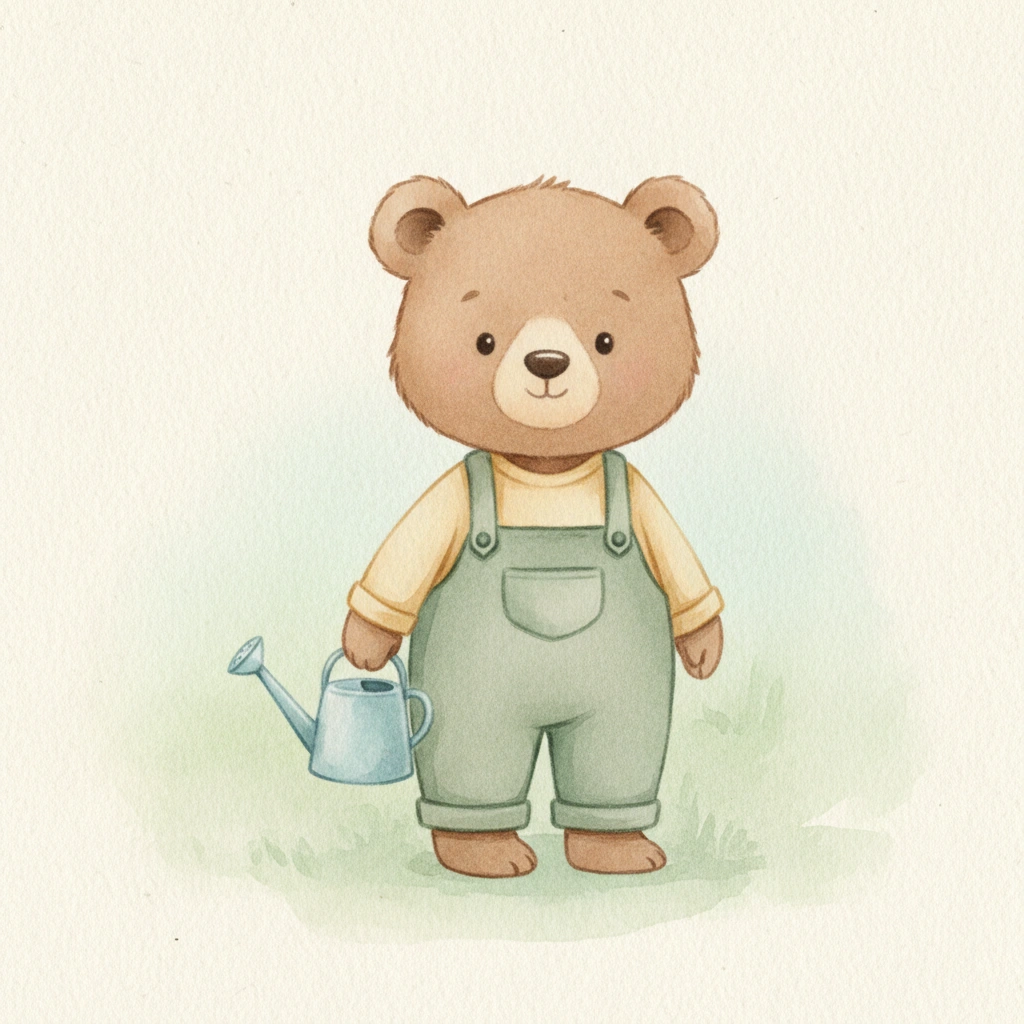
Milo the Little Gardener: the actual image produced by this UI generation.
We checked Milo’s round ears, cream muzzle, sage overalls, pale yellow shirt and blue watering can. The result shows the full character with a textured watercolor appearance. We accepted this first result.
Step 4 — Verify that the character is saved
Click View in Library, then type the full character name in Search characters.... We found the card marked Created. We then reloaded the library page, searched again, and confirmed that the same character and image were still there. The successful generation had already saved the character; no additional save action was needed.
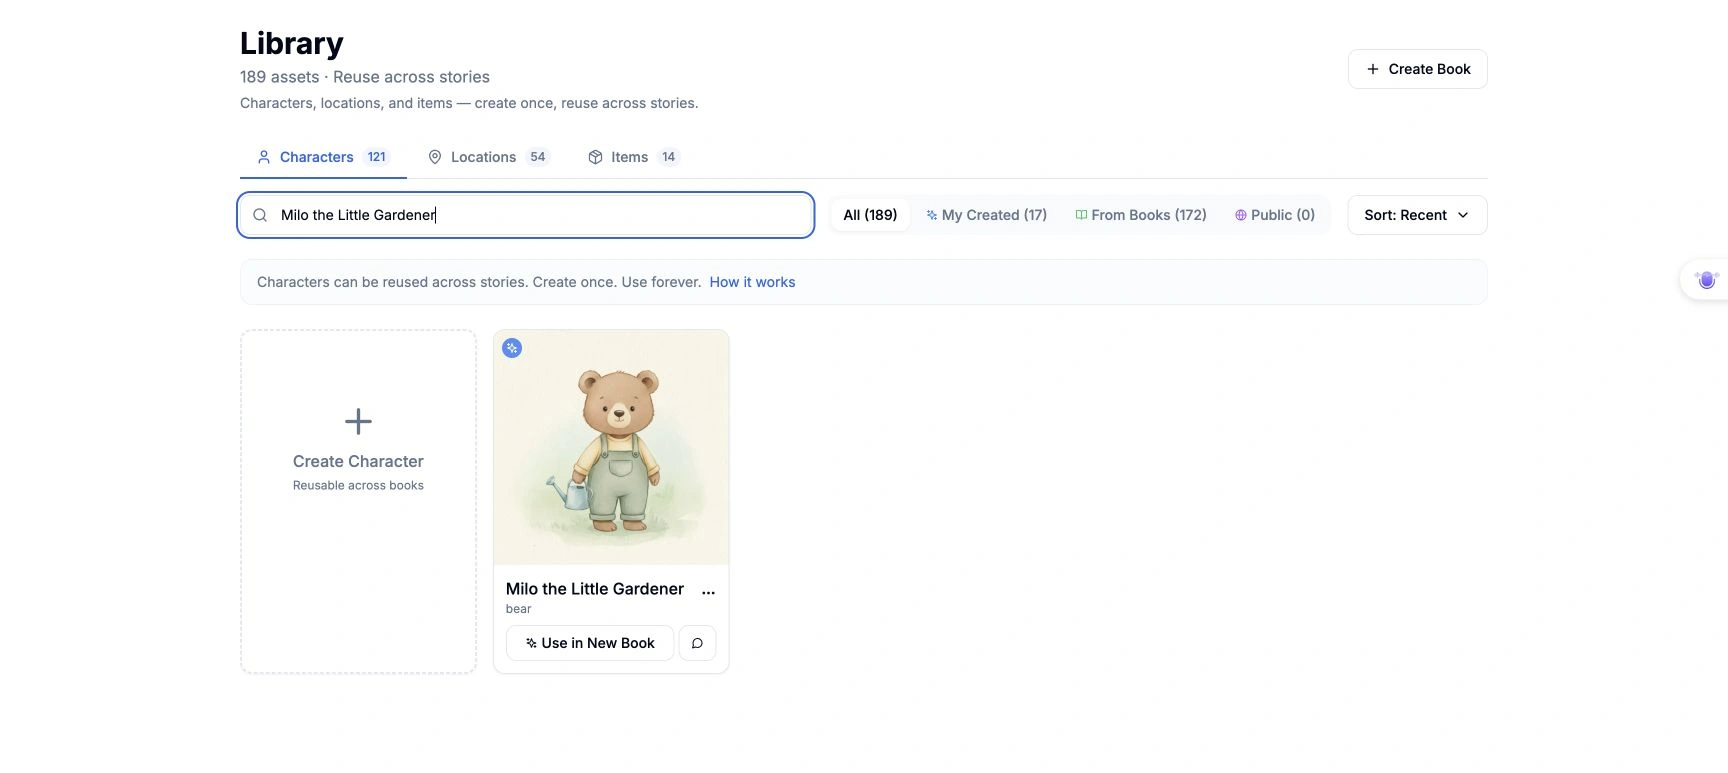
The saved character found by name after reloading the Character Library.
On desktop, click the character image to open its detail panel. Use Show more under Style Guide to read the complete saved description. We checked that the Clothing and Style Guide matched the values entered earlier.
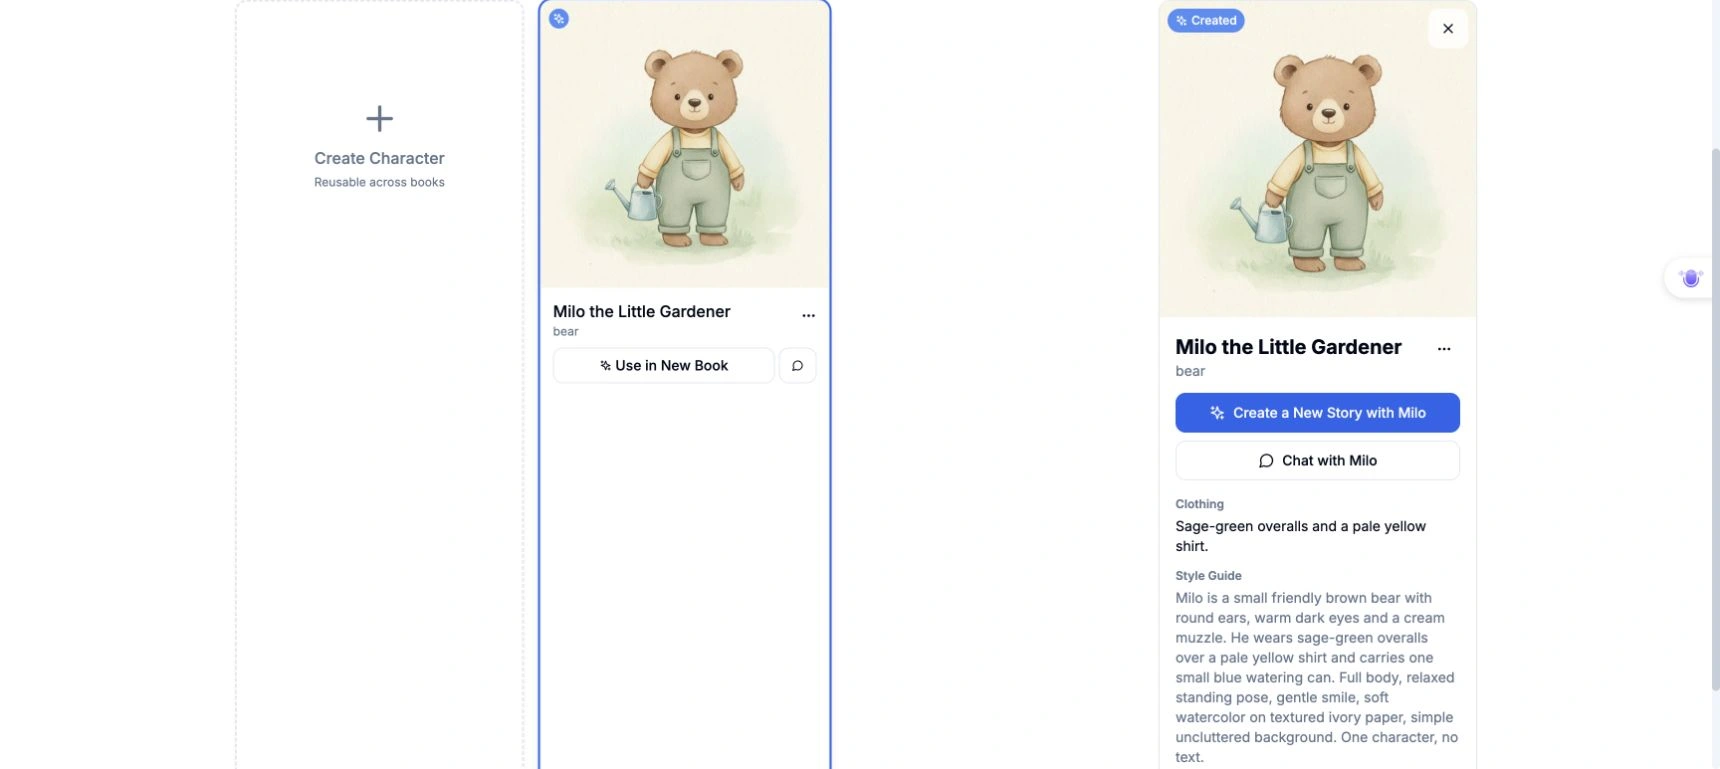
The saved detail panel shows the character, clothing and expanded Style Guide.
Step 5 — Find the entry point for using your character
In the detail panel, click Create a New Story with Milo. In our run, this opened the Create page with the character chip visible and 1 character selected. We verified this selection and stopped before entering or generating a story. This step confirms the handoff to the composer; it does not test character consistency in a generated story.
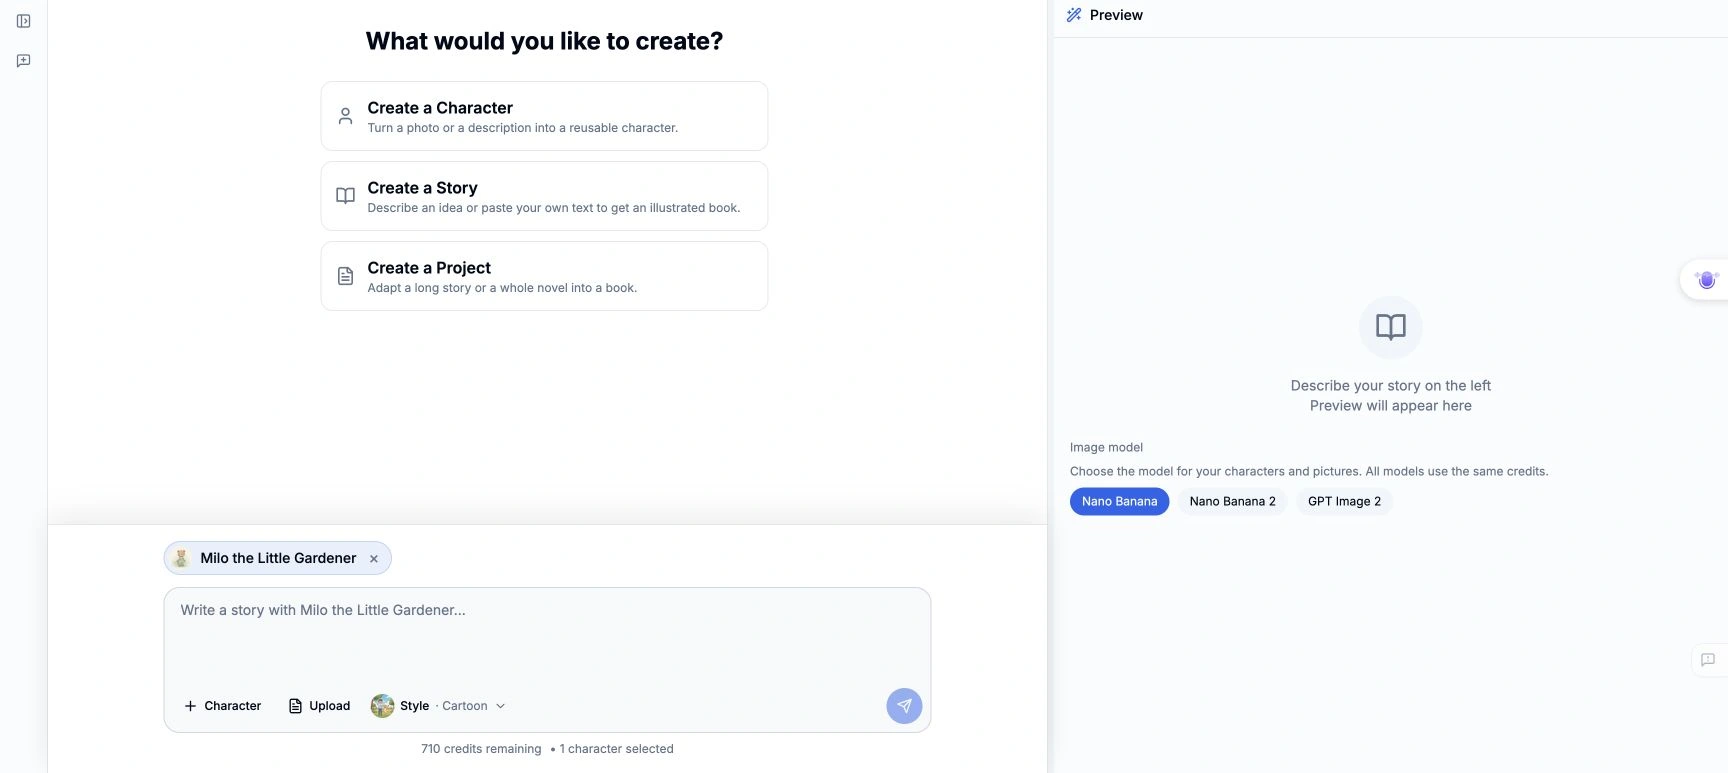
The real story composer with the saved character selected. No story was generated in this step.
The new-story composer opened with Cartoon selected, even though Milo was created in Watercolor. The character selection carried over; the story style did not. Check the story style before generating a later book. We stopped at the composer in this run, so no story pages were generated to test that next stage.
Your result and where to find it
The image above is the finished character result. Open the full result image. Your own saved character is available through your Character Library after signing in and searching its name. The author’s character is an account asset, so this guide does not present a private editor link as a public book or video URL.
Phone check and scope
We also checked a 390-pixel-wide browser view: filling the name and description, selecting Watercolor, enabling the generation action without submitting a second generation, and searching for the saved character. The character card and its story action were visible. Mobile generation itself was not repeated; the only paid generation was the desktop run above.
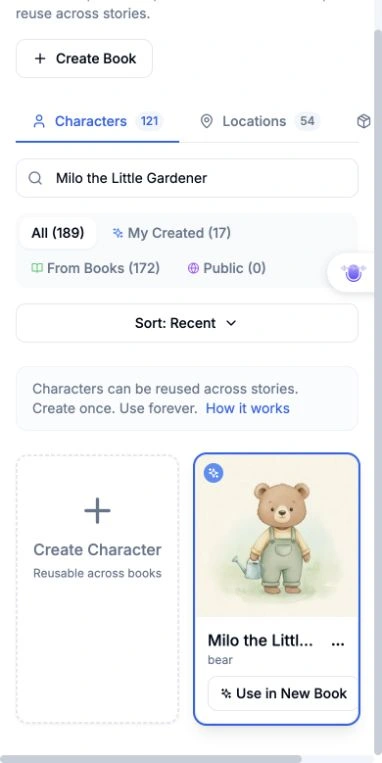
Phone-sized view of the saved character card and its story action.
If the card is missing, check your sign-in account and search spelling before generating another copy. If generation fails, keep the UI error and inspect the existing request state before retrying. Screenshots here were cropped to focus on the relevant UI and omit account controls; no product controls or results were fabricated.
A first like from an active subscriber gives a community author 1 credit. Likes are permanent; self-likes and repeat rewards are excluded.