
Recolor a background object in a C2Story illustration
Change a wooden fence to coral pink in an existing watercolor page. Follow the actual Edit instruction, compare before and after, verify the saved result, and see the phone-layout limits.
Want to change the color of one background object while keeping an illustration recognizable? This walkthrough follows one real Edit image → Describe → Edit operation on September 28, 2026: changing a wooden fence to dusty coral pink.
Starting point and scope
We reused our existing one-page watercolor book, Milo Waters His Sunflower, originally created on September 17. The bear, garden, original illustration and page text were already saved. This run edited that same page image once; it did not create a new character, book or video.
You need to sign in and own a book with a saved illustration. Start in My Books, open your book, then choose Edit Book. Our public story now shows the updated illustration. The original is preserved below for comparison.
Step 1 — Open the existing picture
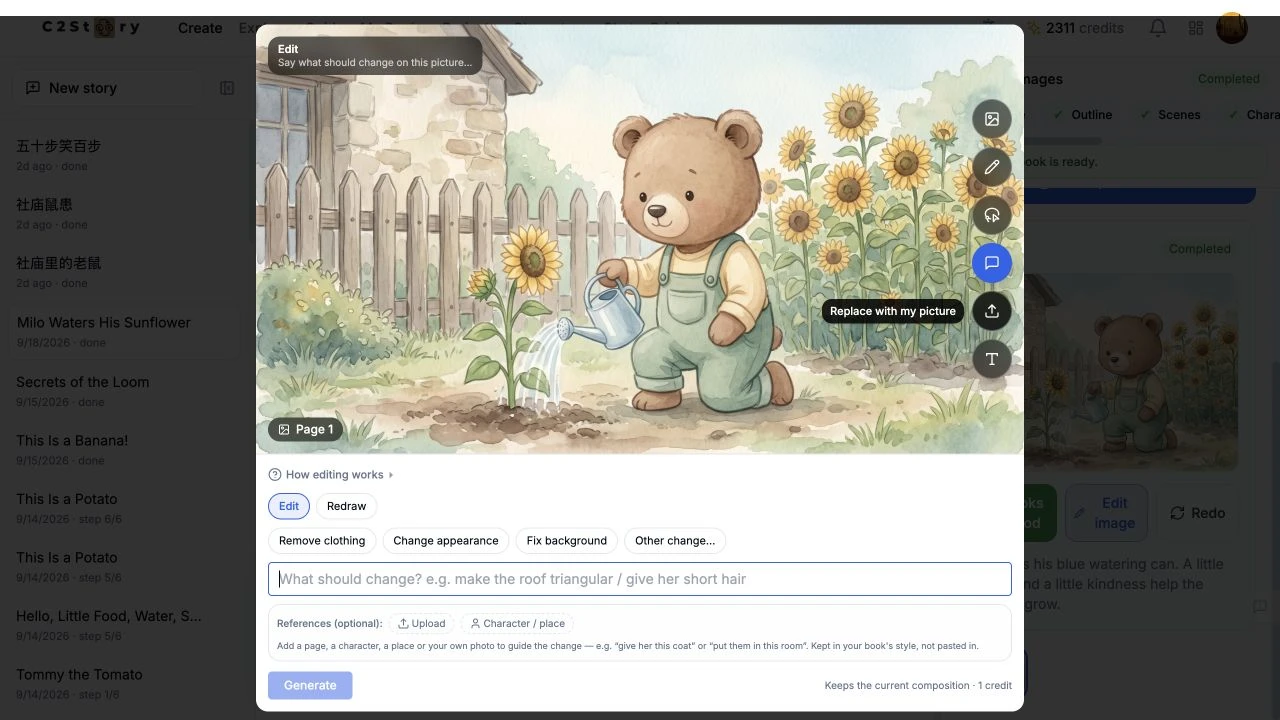
In the editor's Page Images area, we clicked Edit image for Page 1, then Describe. We kept Edit selected. Its visible help says it changes the current picture and keeps the composition. Redraw is a separate option for drawing the saved description again; we did not select it.
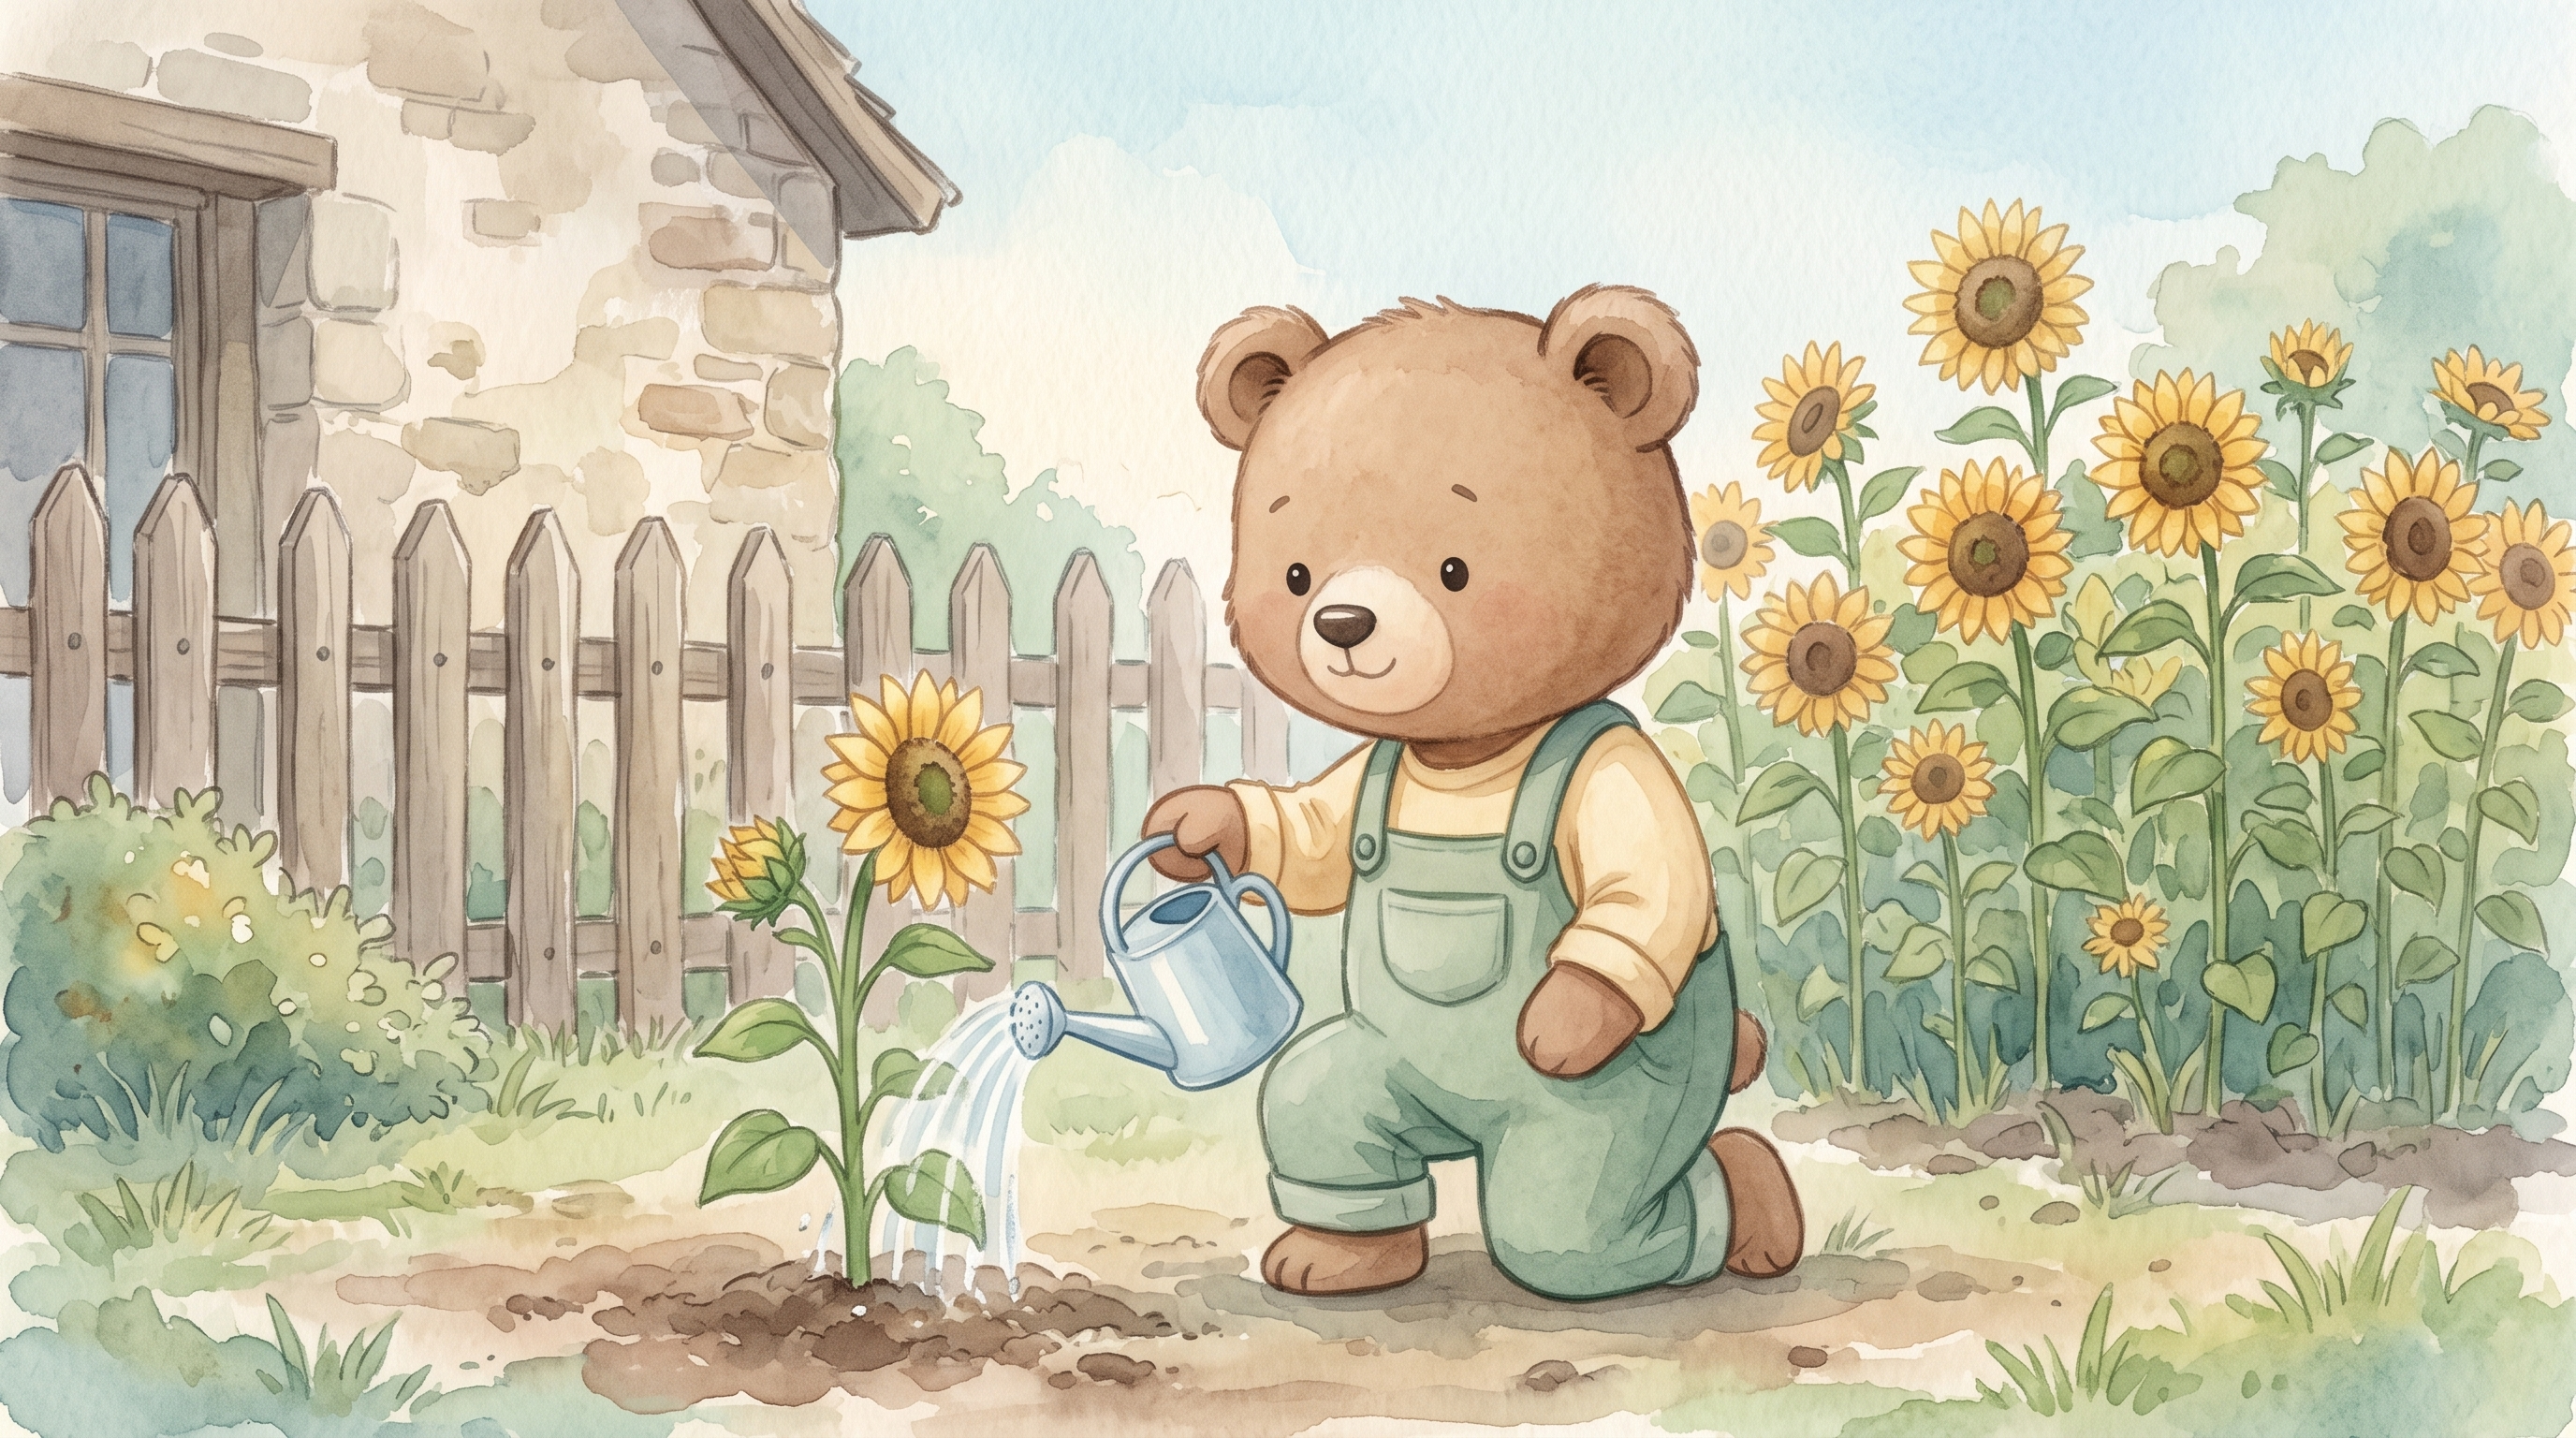
The existing image had a weathered gray-brown picket fence behind Milo. The book's saved style was watercolor. No model or aspect-ratio selector was visible in this editing dialog, and we added no optional reference images. We cannot report a model selection for this operation.
Step 2 — Name one change and the things to preserve
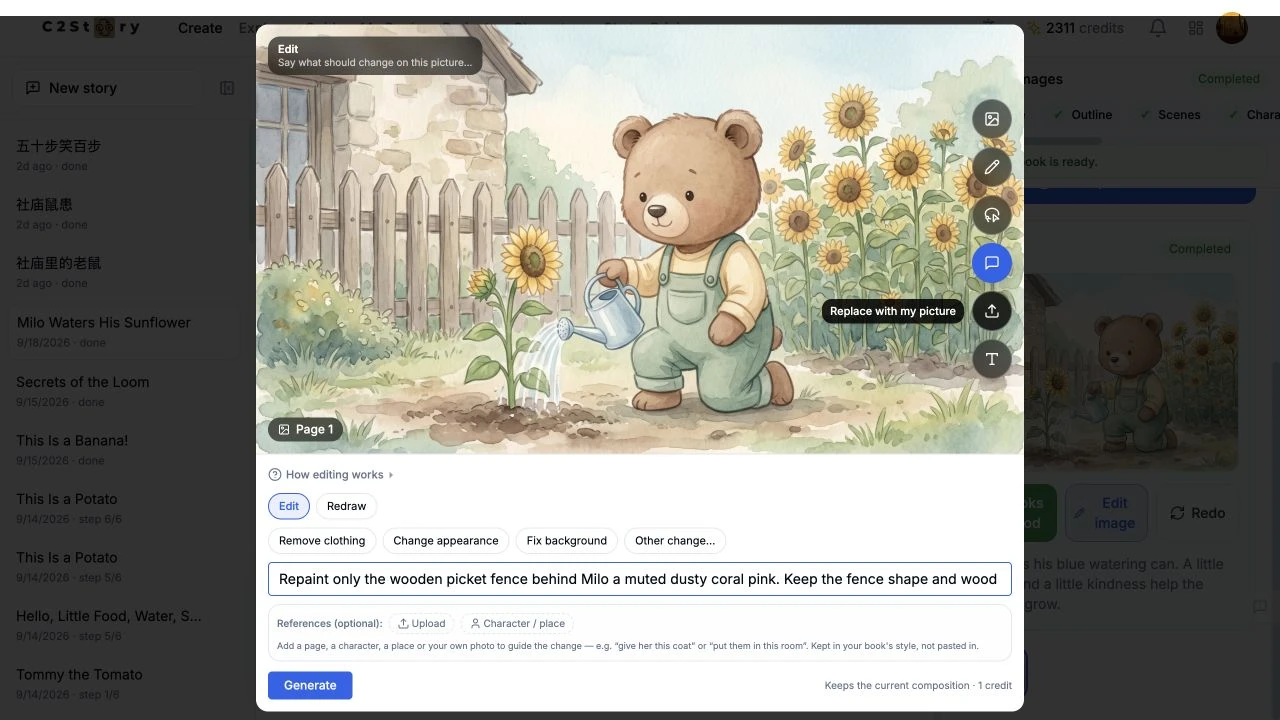
We entered this exact instruction:
Repaint only the wooden picket fence behind Milo a muted dusty coral pink. Keep the fence shape and wood texture. Preserve Milo, his clothes, the blue watering can, all sunflowers, the cottage, the composition and the soft watercolor style.
The first sentence identifies the target and its new color. The remaining sentences identify the surrounding details we wanted to keep. This is the actual submitted text, not a suggested replacement written after seeing the result.
Step 3 — Generate once and wait for Updated
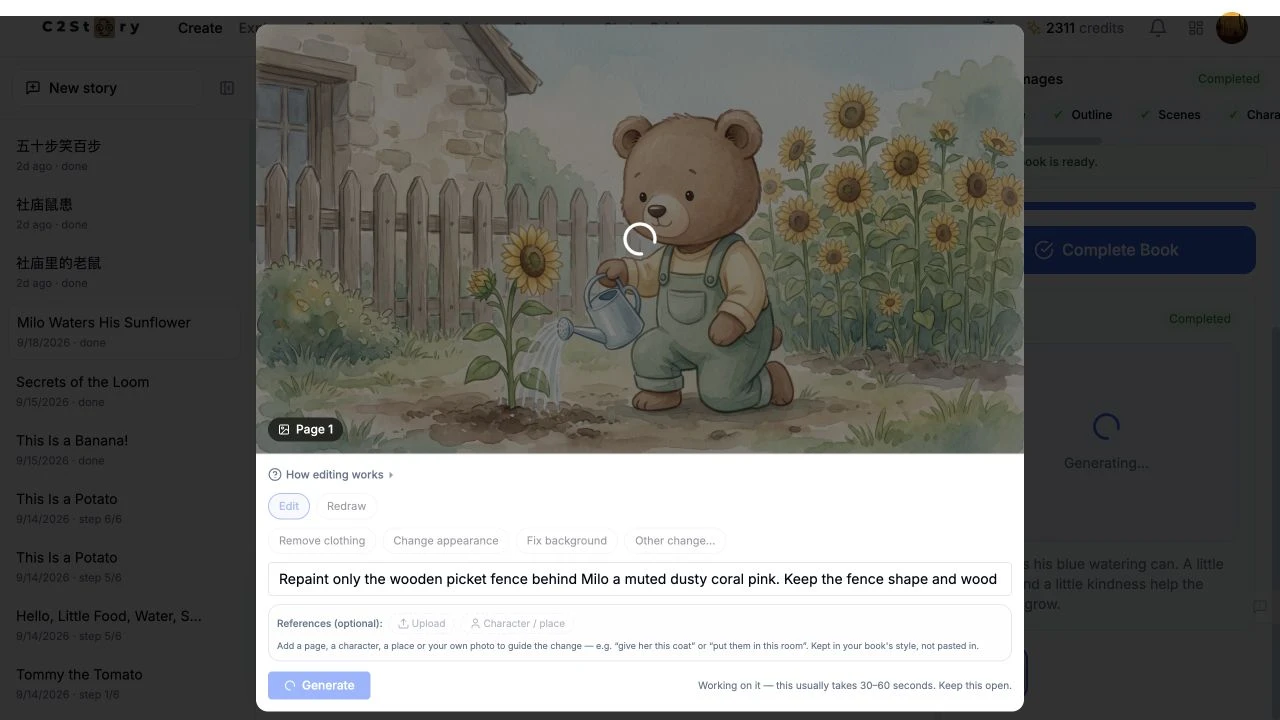
We clicked Generate once. The dialog displayed 1 credit, disabled its controls, and asked us to keep it open. We waited without submitting another edit.
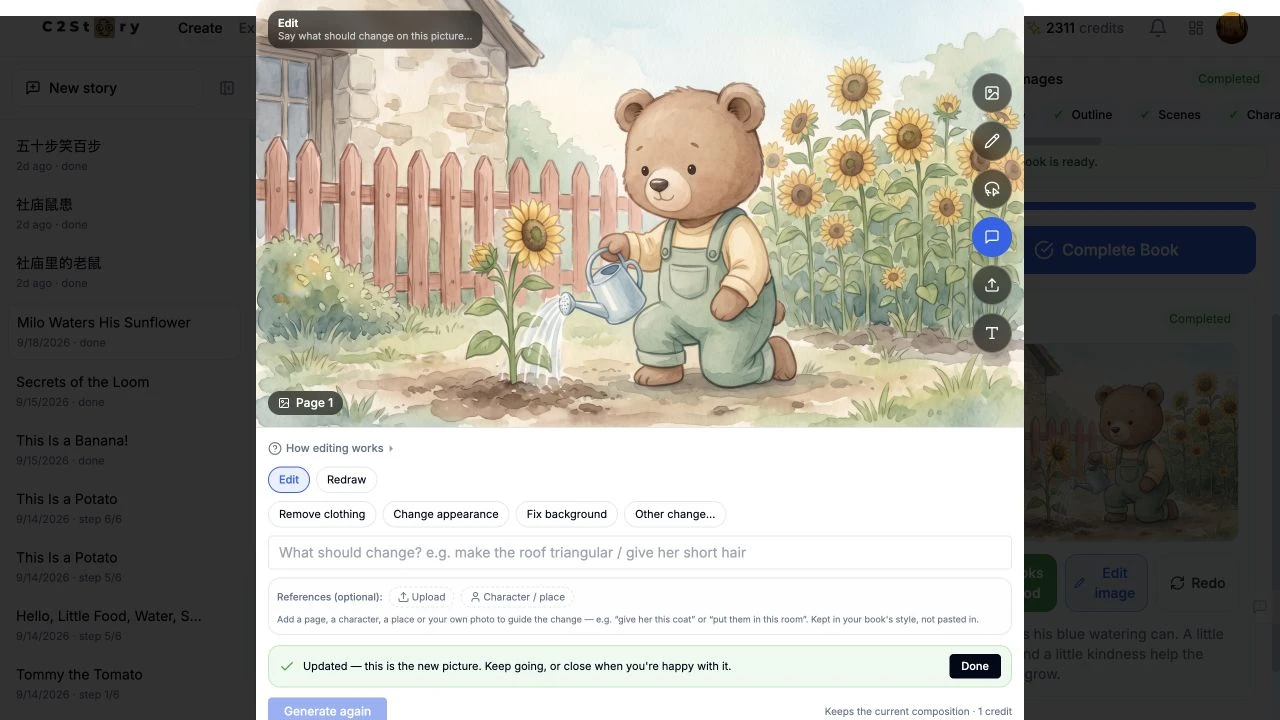
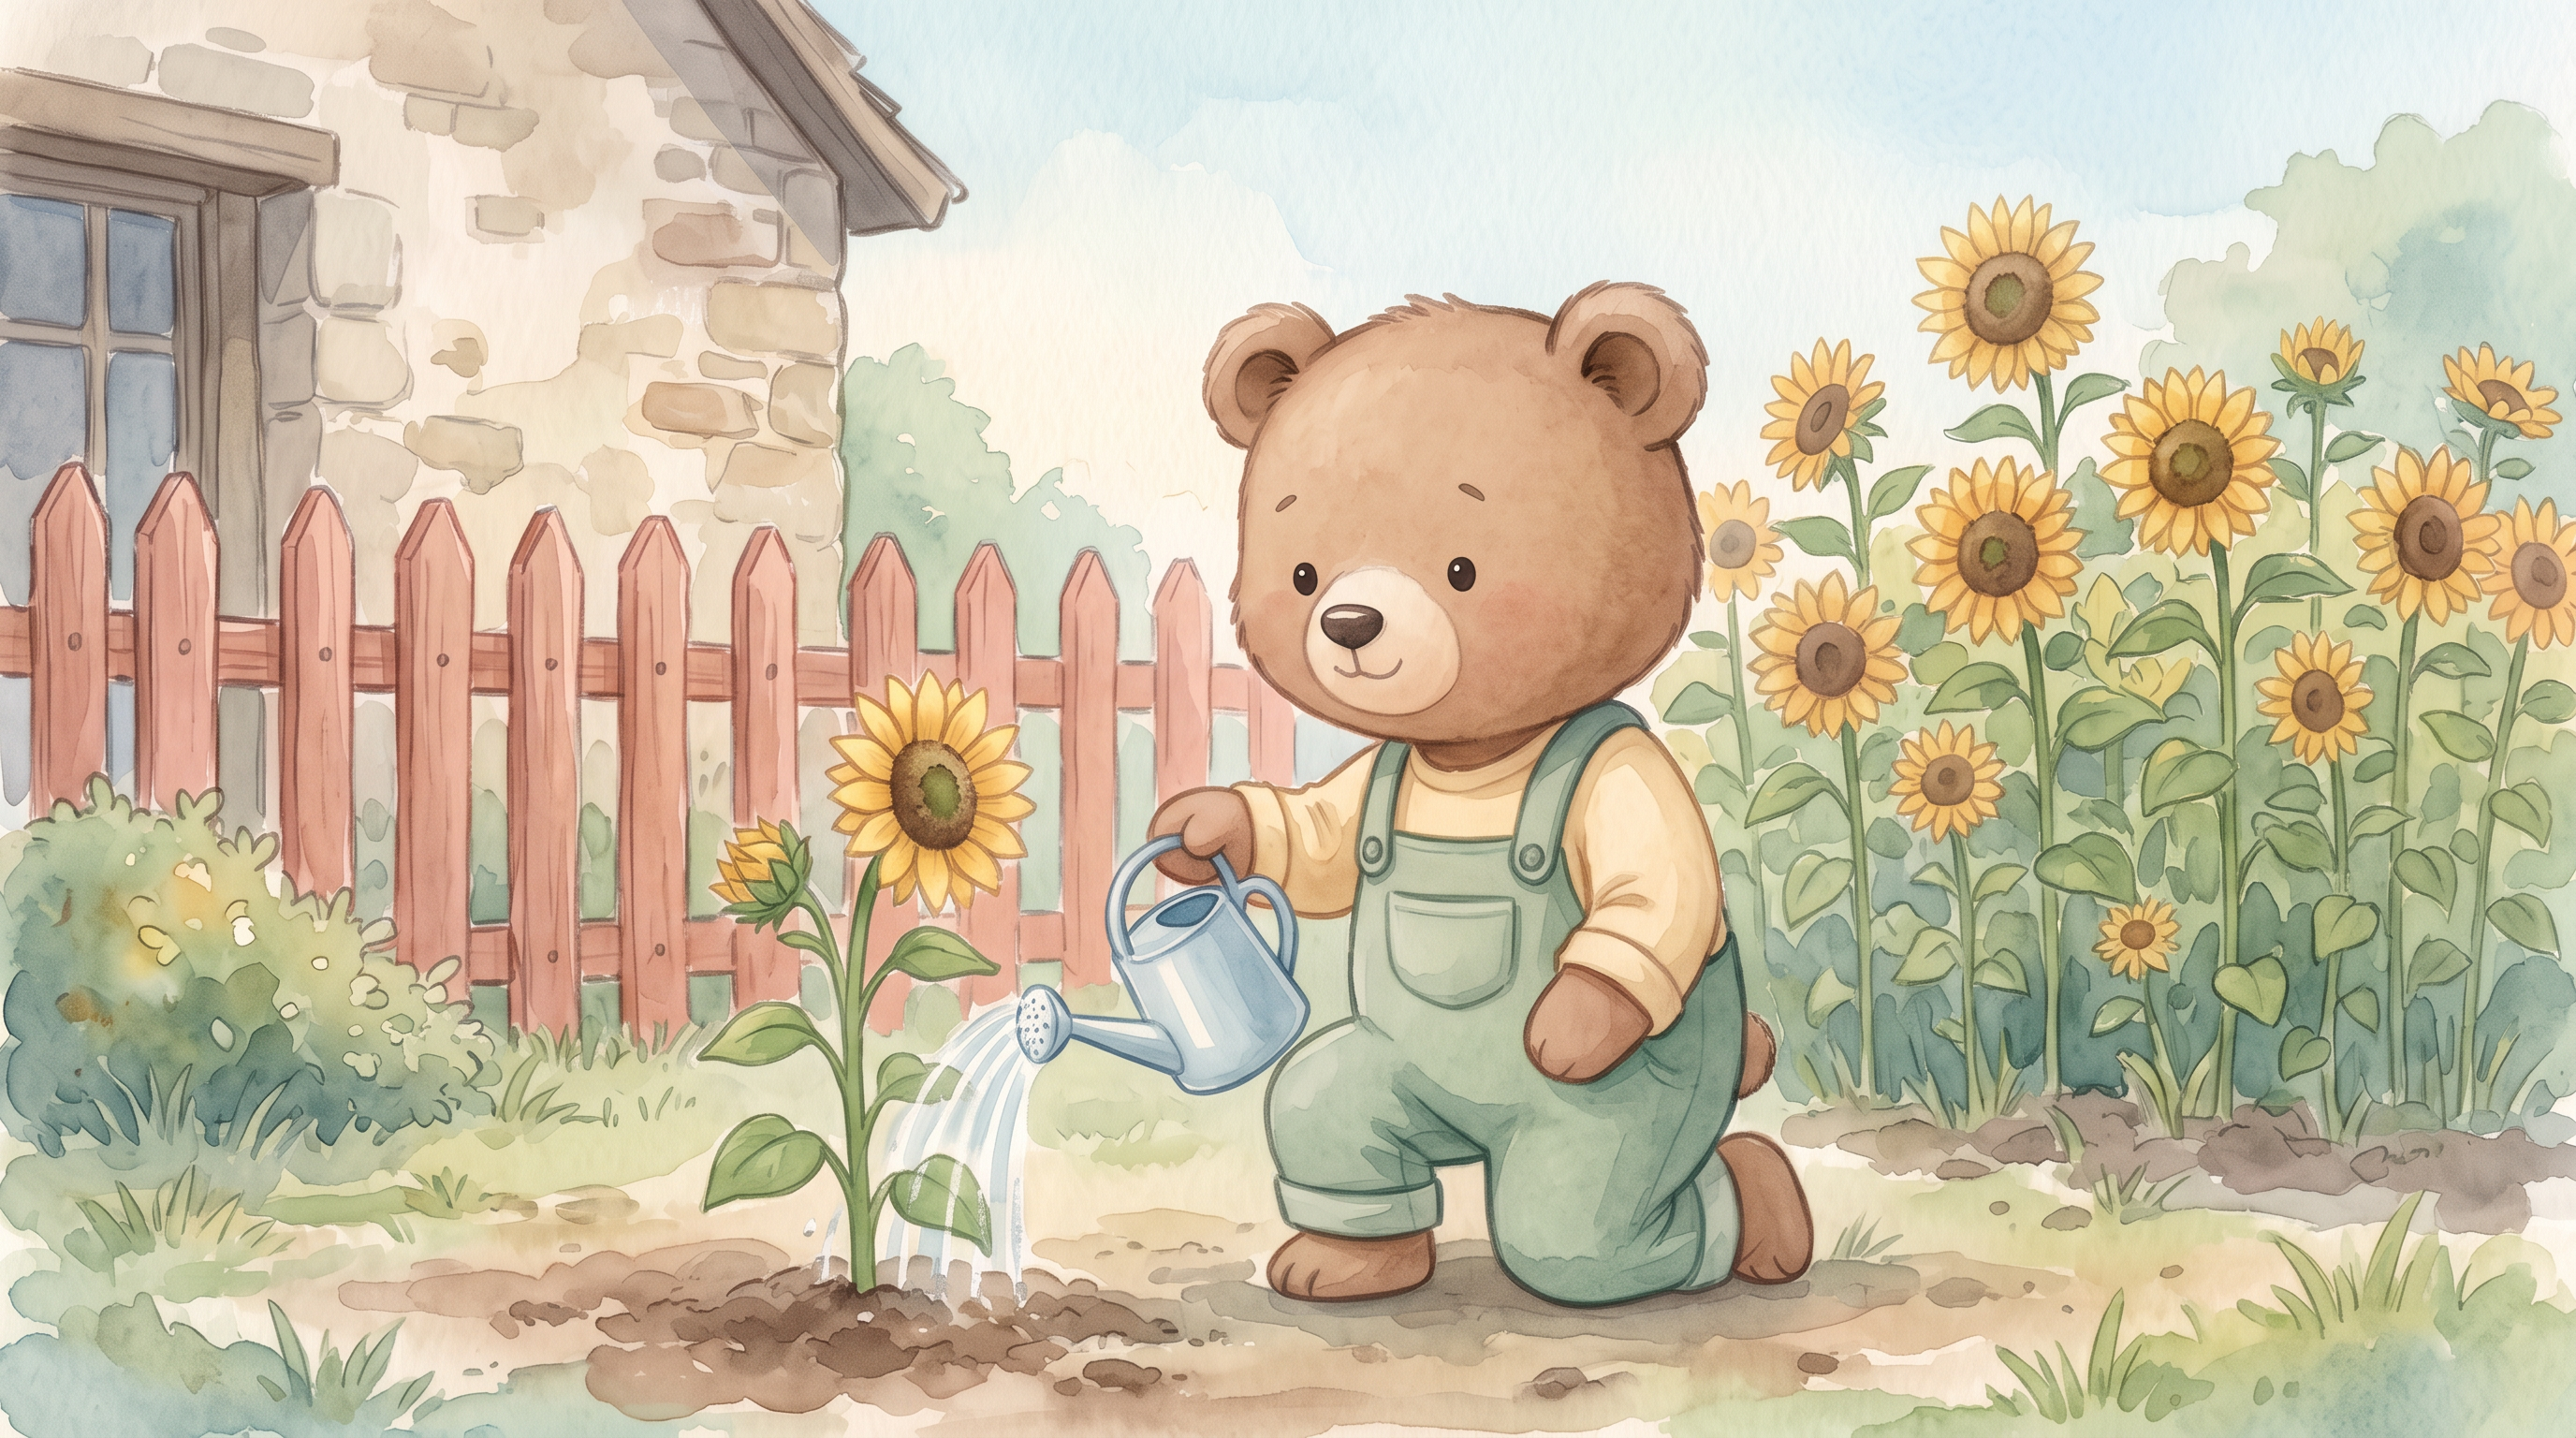
The dialog eventually displayed Updated — this is the new picture, with a Done button. The fence was visibly coral pink, while the bear, clothes, blue watering can, cottage, flowers and broad arrangement remained recognizable. This is a generative edit: the instruction is not a guarantee that every surrounding pixel stays identical.
The UI balance was 2311 before the operation and 2310 afterward, an observed decrease of 1 credit. The original editor's balance remained stale during generation and refreshed to 2310 after reloading. We did not inspect an itemized bill.
Step 4 — Close, reload and reopen
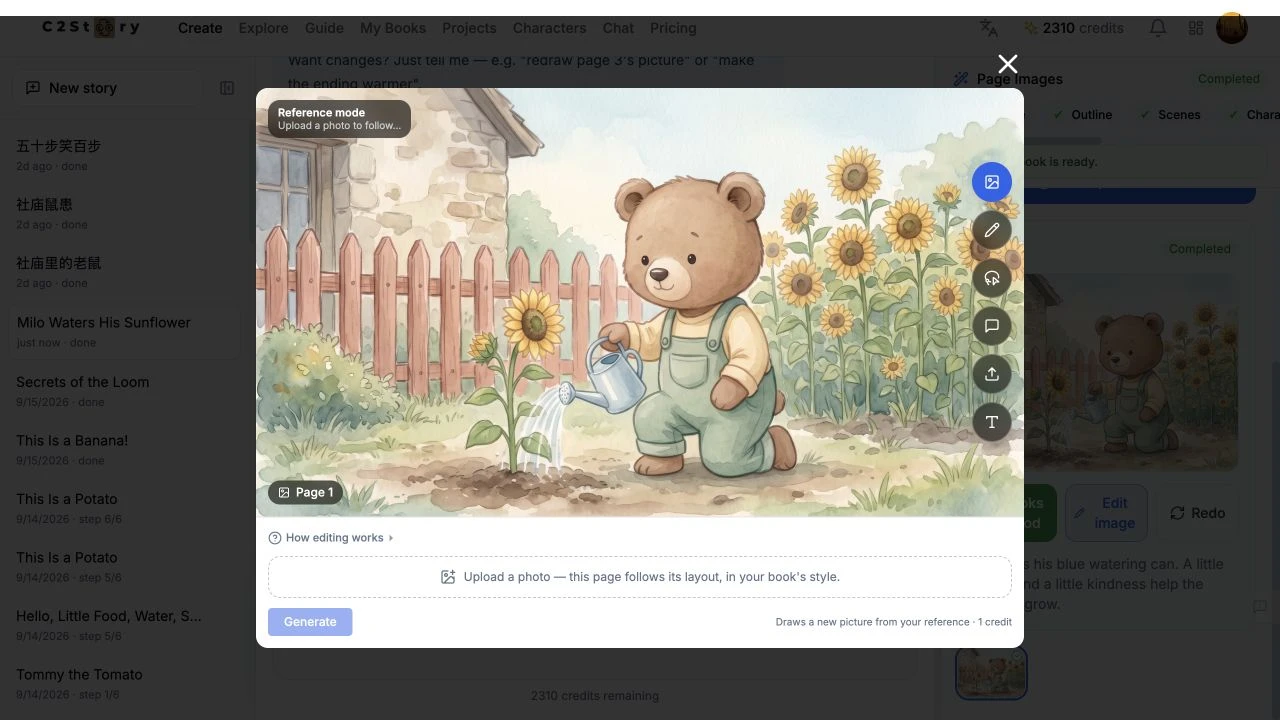
We clicked Done, refreshed the editor, and opened Edit image on Page 1 again. The coral-fence image was still there. We then reopened the book's reading page and confirmed it used the same new image. The page text remained: “Milo tips his blue watering can. A little water and a little kindness help the garden grow.”
Before — the pre-existing illustration:
After — the result of this run's single edit:
Read the updated one-page story. There are no new pages or video to review in this walkthrough.
Step 5 — Check the phone layout before editing there
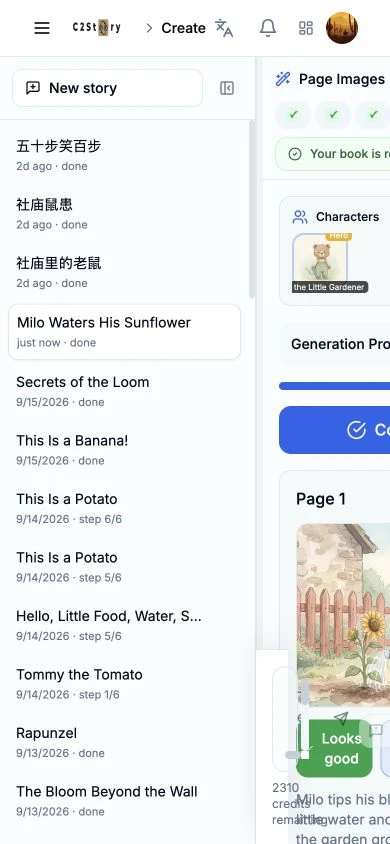
At a simulated 390 × 844 viewport, the history sidebar initially obscured much of the editor. We used Hide story history to expose the page card, opened Edit image, selected Describe, and confirmed the saved result and input field were available.
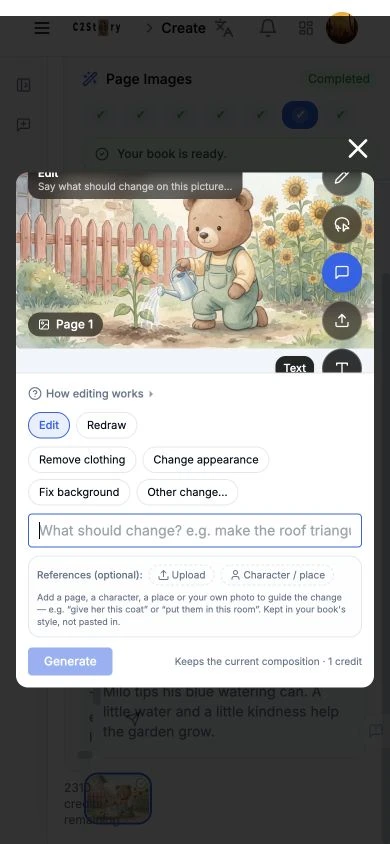
The phone dialog's top mode label and vertical tools were partially clipped. The desktop success dialog also extended beyond the 1280 × 720 viewport, although its Updated message and Done control remained usable. These are layout limitations observed in this run. Use the reading page to inspect the result, and check your controls before submitting an edit on a small screen.
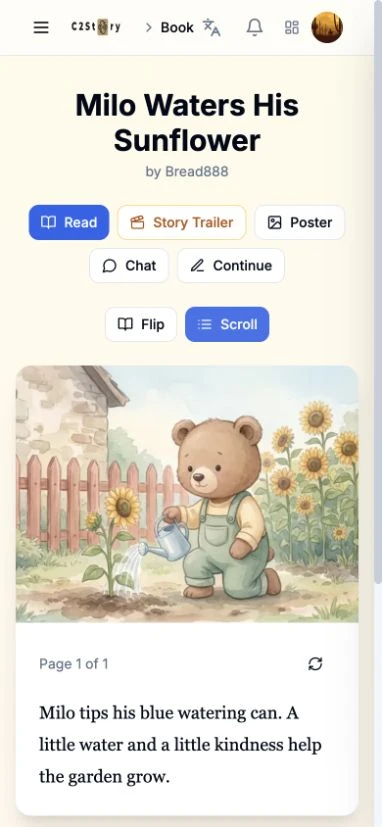
The phone reading page displayed the updated image and text. Mobile generation and a physical phone were not tested: we did not spend another credit simply to repeat the operation.
For this task, completion meant one visibly changed fence, a saved image that survived reopening, and the updated reading page—not a new story or a pixel-identical background outside the target.
A first like from an active subscriber gives a community author 1 credit. Likes are permanent; self-likes and repeat rewards are excluded.